The Instagram Area
The Social Icons Area
The Footer Logo Area
The Footer Text Area
The Instagram Area
- Install & Activate the plugin Smash Balloon Social Photo Feed.
- Go to Instagram Feed → 1. Configure and click on the large blue button to connect your Instagram account.
- Go to 2. Customize to customize your Instagram feed.
In order to display the feed like on the Marni Demo page,- set Number of Photos to 9
- set number of Columns to 9
- set Padding around Images to 0
- if your images look blurry on smaller screens, change Image Resolution to Medium or Full Size
- uncheck the Show Feed Header checkbox
- uncheck the Show the Load More button checkbox
- uncheck the Show the Follow button checkbox
- Save your Changes
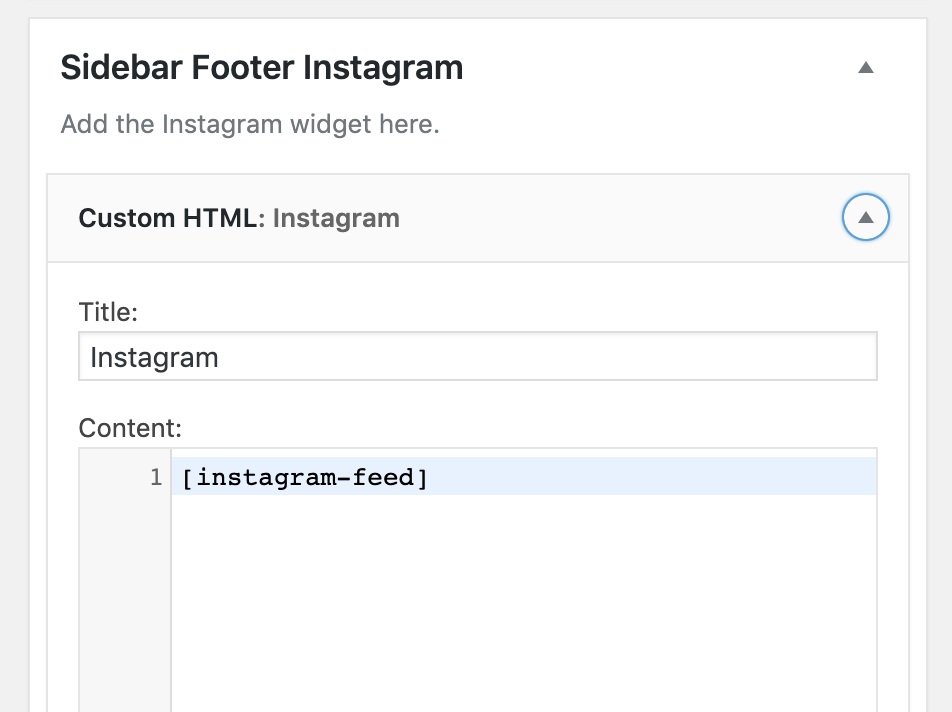
- Now go to Appearance → Widgets and add the Custom HTML widget to the “Instagram Footer” widget area, you can add a title like “Instagram” and add the shortcode
[instagram-feed]into the Content field:
The Social Icons Area
- Go to Appearance → Customize → Layout > Footer and enable “Display social icons in footer”.
- Go to Appearance → Customize → Connect → Social Accounts.
- Click Add new social account, select an account Type and fill in the Account Url and optionally some text like “like us on facebook”, to display next to the social icon. Repeat for each social account.
The Footer Logo
- Go to Appearance → Customize → Layout → Footer.
- Click Select File and upload your logo.
(It is recommended to upload your logo twice the width and height that you actually want to display it so it looks sharp on Retina screens. For example if you wish to display a logo with a width of 100px and a height of 50px, upload a logo with a width of 200px and a height of 100px.) - Below, enter your logo’s height.
(For example if you uploaded a logo with a height of 100px, enter 50.)
The Footer Text Area
Here you can for example enter copyright text. (In order to display the copyright sign, enter © )