The Logo
The Navigation Menu
The Header Layout
The Logo
- Go to Appearance → Customizer → Site Identity .
- Click Select logo and upload your logo.
(It is recommended to upload your logo twice the width and height that you actually want to display it so it looks sharp on Retina screens. For example if you wish to display a logo with a width of 200px and a height of 100px, upload a logo with a width of 400px and a height of 200px.) - Below, enter your logo’s width.
(For example if you uploaded a logo with a width of 400px, enter 200.) - (Info: the MARNI logo uses the “Futura” font.)
The Navigation Menu

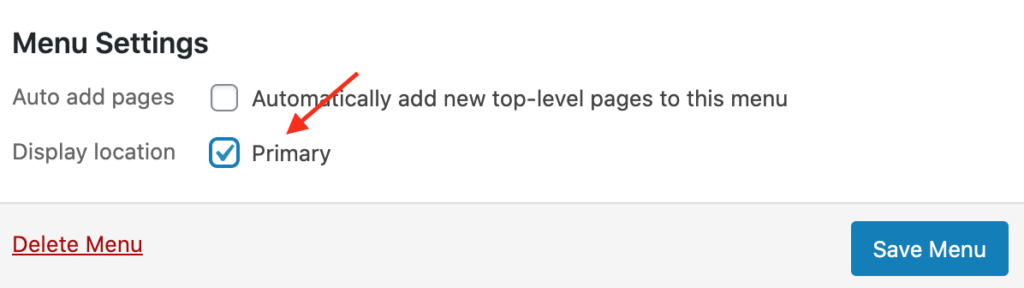
- Click Appearance → Menus.
- Create a new menu or edit the existing one. Detailed instructions on how to work with the WordPress menu can be found in the WordPress Menu User Guide
- In Menu Settings select Display location Primary and click Save Menu.
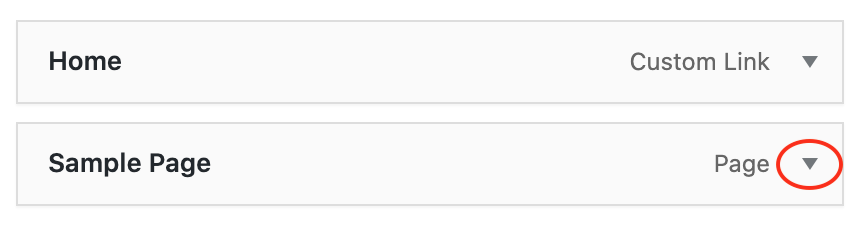
- Click on the drop down arrow of a menu item to change the Navigation Label or if you want to open the menu item in a new tab.
- Click Screen Options in the top right corner for more options.
The Header Layout
- Go to Appearance → Customizer → Layout → Header .
- The theme includes 4 main header layouts:
– Logo centered between Navigation items
– Navigation below Logo
– Navigation in Top Bar
– Logo left – Navigation right
Each of the above layouts comes with additional options. - In order for the social icons to appear in the header, go to Appearance → Customize → Connect→ Social Accounts, click Add new social account and fill in the social account info.
INFO:
The option “Logo centered between Navigation options” will only work if a menu is assigned to the Primary Menu Display Location.